Android N 带来的新通知栏
- 原文链接 : Android N: Introducing upgraded Notifications
- 原文作者 : Joe Birch
- 译者 : rogero0o
Android N 带来的新通知栏
在介绍过 Android N 新功能 图中图 后,我决定深入研究另一个预览版中发布的新功能 - notifications。 Android N 增加了许多新的 notifications API ,让我们来看看增加了什么新功能,并且如何在我们的 app 中实现新功能。
为了能方便的查看所有的新功能,我创建了一个 APP -Notifi ,一个简单的 Android project 用来展示所有的例子。
在 Android N 中,notifications 鸟枪换炮啦! 现在在我们应用中对通知栏的展现,以及动画的控制都增强了许多,更被赋予了许多新的功能,在和 notifications 打交道时,用户体验将得到极大的提高 。 所以到底葫芦里卖的什么药呢? 主要有以下几点:
- 新的系统 notifications 的 Layout 模板 ,更加简单和简洁,使得 notifications 不再如此凌乱
- Bundling(绑定)意味着现在 notifications 不会再充斥着用户的状态栏了,相关的 notifications 现在可以在设计在一个可扩展的 notification group 中展示
- 使用新的 内联回复动作 使得用户可以直接在 notifications 中回复文本,不再需要打开别的 app 或者切换当前页面
- 新的自定义 views 使我们的 notifications 样式更加丰富多彩,更加让人喜欢
这些看起来都很腻害对不对?所以让我们继续深入并且看看具体实现方法。
Notification 模板
Android N 介绍了一些在显示 notification 时使用的新的模板。这些新的模板重新排版了之前 SDK 版本的模板,使他们看起来更加的简洁清爽。这些新的模板将自动的被系统适配使用,所以我们不需要改变代码来创建一个 notification 。
之前我们创建一个 notification 可能像是这样的:
NotificationCompat.Builder builder = new NotificationCompat.Builder(context)
    .setSmallIcon(R.drawable.ic_phonelink_ring_primary_24dp)
    .setContentTitle(title)
    .setContentText(message)
    .setLargeIcon(largeIcon)
    .setAutoCancel(true);
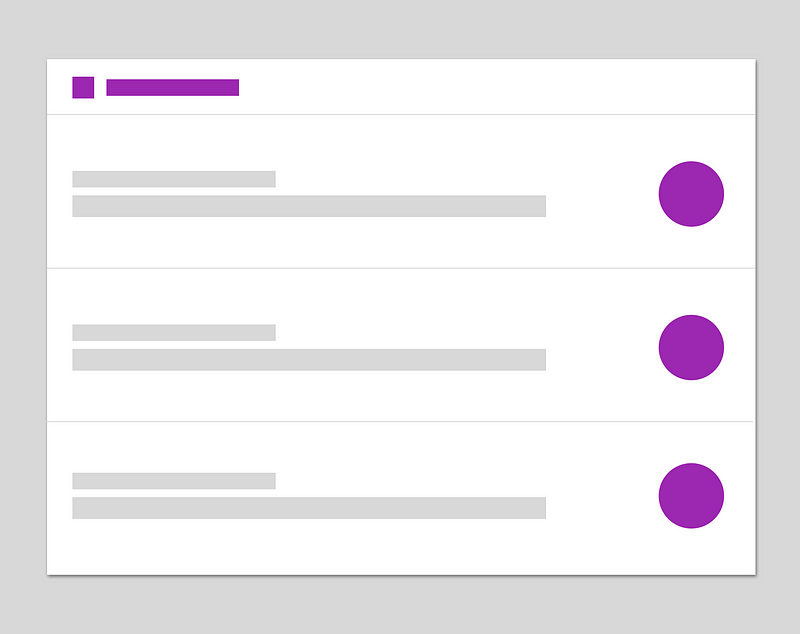
之前的版本,使用上述代码显示的 notification 效果将如下图:

现在在 Android N 上,新的模板(使用的代码并未改变)现在将展示成这样:
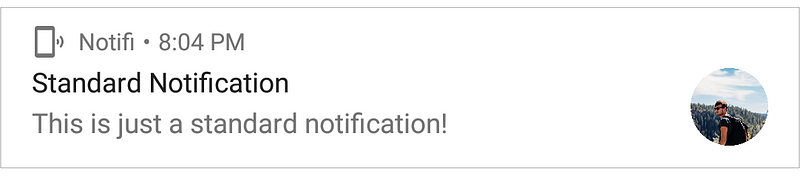
这个新的 notification 样式模板看起来并不是那么简洁,但是我觉得这带来了更多的视觉方面的焦点并且减少了 notification 内容展示空间中令人分心的部分。并且,你完全不需要更改你的代码 - 系统将自动默认的显示新的样式。
注释:请记得你可以使用一些样式来设置你的 notification 并且通过在创建时调用 setColor() 来设置 notification 的颜色值。
NotificationCompat.Builder builder = new NotificationCompat.Builder(context)
// Other properties
.setColor(ContextCompat.getColor(context, R.color.primary));
使用上述代码将设置 notification 图标和标题的颜色,和添加到 notification 中的任何动作都是一样的。
绑定 notification
在 Android N 中,我们可以绑定 notification 了,这是一组相关的 notification ,我们可以在一个单独的 notification 头部下显示多个 notification 。当你发送多个相关的 notification 时,你应该确认他们在一个组中来避免这些 notification 塞满了用户的状态栏。这会使用户感到非常的不友好,所以管理任何有关系的 notification 能明显的提升用户的体验。
所以为了实现绑定 notification 的功能我们首先需要设置一个我们的 notification 来当做 ‘小组概要’的 notification,这个小组概要的 notification 将不会出现在 notification 的堆栈中,但在点击前将是唯一显示在设备上的 notification ,点击展开后,将作为我们的 notification 栈头的唯一通知。组中的 notification 是这个 notification 栈的主要内容。
注意:你必须设置一个 notification 作为 ‘小组标题’,不然你的 notification 将不会以组的形式展现。
接下来,我们可以在创建 notification 实例时使用 setGroup() 来设置一个 string 类型的组 ID 用来组织我们的 notification ,像这样:
NotificationCompat.Builder builderOne = new NotificationCompat.Builder(context)
// Other properties
.setGroupSummary(true)
.setGroup(KEY_NOTIFICATION_GROUP);

NotificationCompat.Builder builderTwo = new NotificationCompat.Builder(context)
// Other properties
.setGroupSummary(true)
.setGroup(KEY_NOTIFICATION_GROUP);

NotificationCompat.Builder builderThree = new NotificationCompat.Builder(context)
// Other properties
.setGroupSummary(true)
.setGroup(KEY_NOTIFICATION_GROUP);
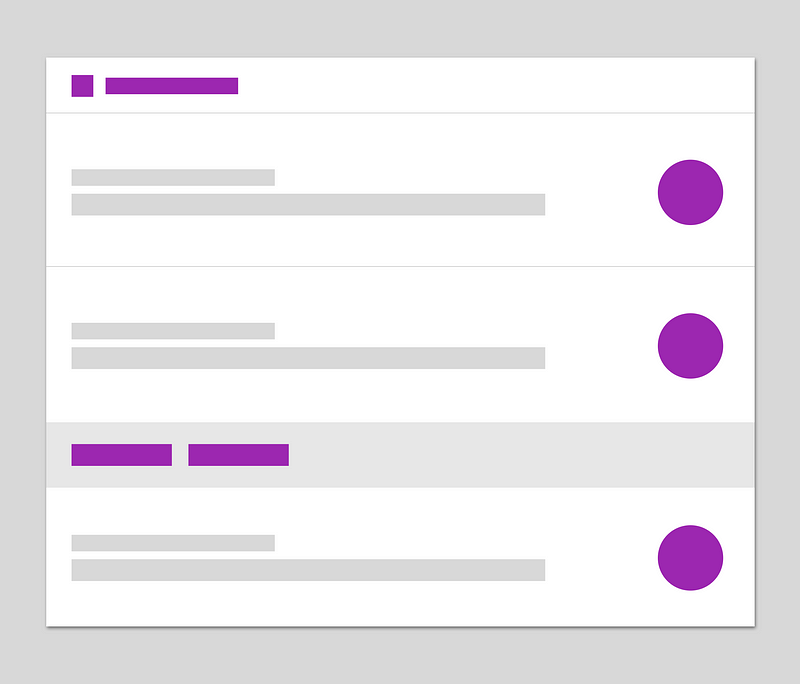
这将通知 notification manager 这些 notification 都是属于同一个组的,这样系统将会把这些 notification 为我们绑定到一起 - 就是这么简单! 这是一个重新定义我们展示 notification 的绝妙的方法,现在我们能将他们组织到一个 notification 之下使他们能在同一时间被用户看到,产生的效果如下图所示:
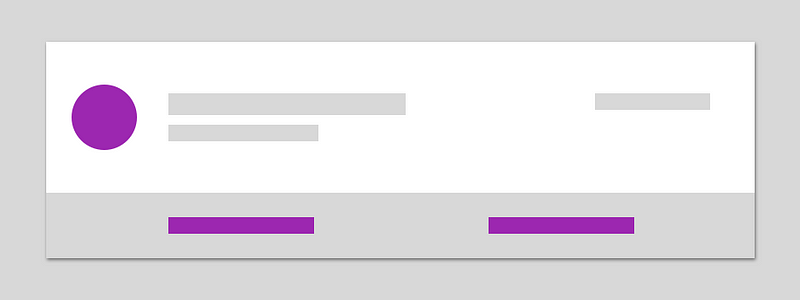
Bundled Notifications 的动作
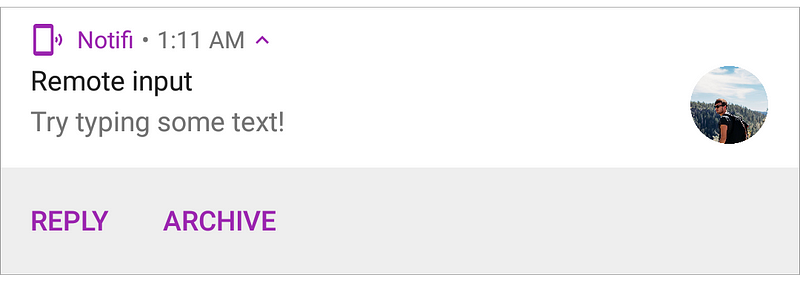
如果这都不能满足你,就像标准的 notification 一样我们可以对 notification 使用动作,这也是绑定功能的一部分。首先,这些将会被折叠成 notification 的一部分并且不被用户所见 - 然而用户可以点击在描述 notification 上的箭头来揭示这些动作,就像下图所示:
这些动作将会以标准方法相同的处理方式作用在 notification 上,所以不需要任何额外的工作。所有我们需要做的都只是创建一个新的动作实例并且将它指向我们的 notification , 像下面这样:
PendingIntent archiveIntent = PendingIntent.getActivity(...);
NotificationCompat.Action replyAction = ...;
NotificationCompat.Action archiveAction = ...;

NotificationCompat.Builder builder = new NotificationCompat.Builder(context)
    // Other properties
    .setGroup(KEY_NOTIFICATION_GROUP)
    .addAction(replyAction)
    .addAction(archiveAction);
直接回复
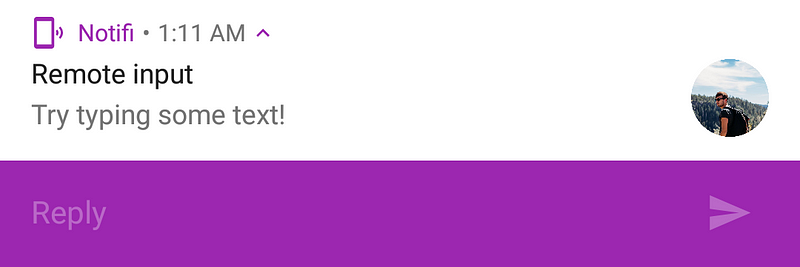
使用 RemoteInput API (远程输入 API )(从 API level 4 开始就支持了) 我们就可以展示能让用户直接回复的 notification ,不需要让用户进入 app 来回复。这是通过显示一个内联回复动作来实现的,本质上来说就是显示一个添加按钮在 notification 上来允许用户输入直接输入回复文本。这使得用户与我们的 APP 相处的更加融洽,不需要经常打开应用,让用户更好的专注在正在处理的事情上。
当用户使用 notification 内置回复动作时,文本将会被由我们动作指定的 intent 发送到我们的 app 中(可能是 activity,service 等等),在那我们获得用户输入的文本并进行下一步处理。
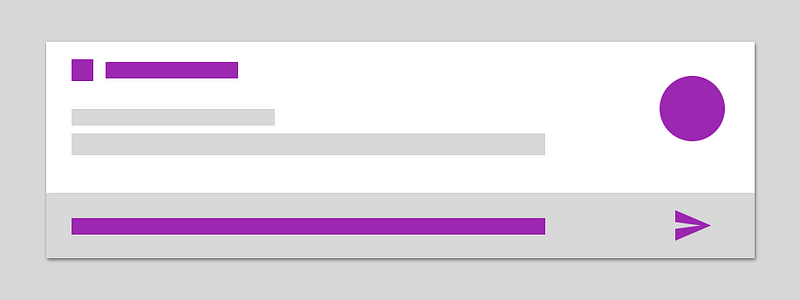
添加 inline actions (内联回复行为)
现在我们已经学习了关于新的内联回复行为,但是我们该如何实现呢? 为了将内联回复加到 notificaiton ,第一步我们需要创建一个新的 RemoteInput 实例:
RemoteInput remoteInput = new RemoteInput.Builder(KEY_TEXT_REPLY)
    .setLabel(LABEL_REPLY)
    .build();
在创建 RemoteIput 实例时需要设置一个认证身份的 KEY (在上面代码中为 KEY_TEXT_REPLY), 在后面我们需要在我们的应用中使用这个 KEY 来取回用户在 notification 中输入的文本。完成之后,我们就能简单的设置用于快速回复动作的提示语(也可以是空的)。快速回复的提交按钮已经被系统自动的显示在 notificaiton 中。
接下来,我们需要创建 PendingIntent 实例用来发送用户提交的数据。这些用于 notification 的 PendingIntent 与之前并没有太大的区别:
PendingIntent replyIntent = PendingIntent.getActivity(context,
        REPLY_INTENT_ID,
        getDirectReplyIntent(context, LABEL_REPLY),
        PendingIntent.FLAG_UPDATE_CURRENT);

PendingIntent archiveIntent = PendingIntent.getActivity(context,
        ARCHIVE_INTENT_ID,
        getDirectReplyIntent(context, LABEL_ARCHIVE),
        PendingIntent.FLAG_UPDATE_CURRENT);

private static Intent getDirectReplyIntent(Context context, String label) {
        return MessageActivity.getStartIntent(context)
                .addFlags(Intent.FLAG_INCLUDE_STOPPED_PACKAGES)
                .setAction(REPLY_ACTION)
                .putExtra(CONVERSATION_LABEL, label);
}
现在我们创建了这些 PendingIntents ,自然要让他们用起来!这里是 remoteInput 实例使用的地方。我们需要开始创建回复动作,让我们来看看以下的 replayAction 实例:
NotificationCompat.Action replyAction =
        new NotificationCompat.Action.Builder(R.drawable.ic_reply,
                LABEL_REPLY, replyIntent)
                .addRemoteInput(remoteInput)
                .build();

NotificationCompat.Action archiveAction =
        new NotificationCompat.Action.Builder(R.drawable.ic_archive,
                LABEL_ARCHIVE, archiveIntent)
                .build();
这里我们创建一个普通的活动然后调用 addRemoteInput() 方法来把这个 remoteInput 实例添加到这个活动中。这里描述了当这个活动被触发时,我们希望给用户展示内联回复动作在 notification 中。当用户点击提交了快速回复的提交按钮时,输入的内容将会包含在我们的 replyIntent 中。
在这之后,我们可以简单的添加动作到 Notification Builder 像下面这样(这里再次像之前的版本一样),我们不需要为内联回复动作添加任何新的代码来实现他。
NotificationCompat.Builder builder = new NotificationCompat.Builder(context)
        .setSmallIcon(R.drawable.ic_phonelink_ring_primary_24dp)
        .setContentTitle(title)
        .setContentText(message)
        .setLargeIcon(largeIcon)
        .addAction(replyAction);
        .addAction(archiveAction);
        .setAutoCancel(true);
一旦我们实现了以上的代码,那么实现的效果将会像如下展示:

从内联动作中获取数据
我们实现了内联回复动作并且这看起来很棒,但是为了让它变得有效我们需要获取到用户提交的数据。下面是个简单的例子:
Bundle bundle = RemoteInput.getResultsFromIntent(intent);
if (remoteInput != null) {
    return bundle.getCharSequence(NotificationUtil.KEY_TEXT_REPLY);
}
在这里我们使用了 RemoteInput API 来重新得到 intent 中的输入数据。此时,如果返回结果存在,我们就能将数据从 bundle 中取得。我们通过使用之前用来存储数据的 key 来获取数据,在例子中就是之前提到的KEY_TEXT_REPLY 。
内联回复样式
我们同样能设置内联回复动作的颜色,方法是在创建时使用 setColor() 方法来实现。这看起来是不是很不错?
同时你也可以看到这设置了 notification 的所有组件。我们可以通过以下代码实现:
NotificationCompat.Builder builder = new NotificationCompat.Builder(context)
    // Other properties
    .setColor(ContextCompat.getColor(context, R.color.primary));
浮动通知
浮动通知动作正如在 Marshmallow (棉花糖)版本中一样,然而现在他们在 Android N 中使用了升级后的模板。这赋予了我们一个新的 notification ,如下所示:

Android N 中的浮动通知很棒的功能是我们可以自定义 Layouts 来装饰我们的 notification ,下一章中我们将详细解析。
自定义视图的 notification
在 android 之前的版本中,我们仍然可以使用自定义布局来显示我们的 notification . 这意味着我们可以使用我们自己的布局资源来装饰 notification 的样子。这样的好处有:
- 显示之前不被 Notifications API 支持的组件
- 在你的 notification 中显示更有意义、更方便查看的信息,给用户提供更有意义的信息而不需要打开应用
- 在你的 notification 中添加商标来让 notification 和你的应用统一外观
综上所述,你需要确认保持你的 notification 设计是最简洁的。我们不想要用过多的信息来淹没用户,特别是在这样小的一个空间。允许用户从你的 notification 中获取到他想要的,同时仍然保持细节和设计上的简洁。
所以,请牢记保持简洁,接下来我们就能创建一个自定义的 layout 了!其实这相当的简单,我们可以通过使用 RemoteViews 类来创建我们的自定义 notification .
RemoteViews remoteViews = new RemoteViews(context.getPackageName(), R.layout.notif_custom_view);
remoteViews.setImageViewResource(R.id.image_icon, iconResource);
remoteViews.setTextViewText(R.id.text_title, title);
remoteViews.setTextViewText(R.id.text_message, message);
remoteViews.setImageViewResource(R.id.image_end, imageResource);
第一步,创建一个 RemoteView 的实例,传入我们的应用包名(系统处理 notifications 时需要用到),再传入我们需要应用到 notification 中的 layout 。接下来我们可以使用由 RemoteView 类提供的方法来设置 layout 中的 view 需要使用到的 数据/资源。在 RemoteView 类中,我使用了以下方法:
- setImageViewResource(viewId, resource) - image 的 resource 和我们需要展示图片的 view 的 ID
- setTextViewText(viewId, text) - 我们需要展示的文本和需要展示文本的 view 的 ID
这个类允许我们设置给 view 的数据类型有 data values , resources , listeners 等等。如果想要查看完成的说明,请查阅文档。
我们现在创建了一个 RemoteView 的实例,我们需要使用一个 notification 来展示我们想到达到的效果。
折叠视图
在上一章中我们将 RemoteView 实例中的 layout 和它的视图中使用的数据申明在一起,所以当我们创建 notification 时我们需要做的只是传递 RemoteView 实例到 builder 的 setCustomContentView() 这个方法中。在下面这个例子中,我们提供了折叠(正常)状态的 notification 的自定义视图:
Notification.Builder builder = new Notification.Builder(context)
        .setSmallIcon(R.drawable.ic_phonelink_ring_primary_24dp)
        .setCustomContentView(remoteViews)
        .setStyle(new Notification.DecoratedCustomViewStyle());
        .setAutoCancel(true);
为折叠状态的 notification 设置一个自定义视图将会单独展现一个折叠了的 noti1 . 我们还没设置展开的状态,所以 notification 将不会展开,效果如下图所示:

展开视图
如上所述,我们同样可以提供一个自定义视图给展开状态的 notification , 只需要传递一个 RemoteViews 实例到 setCustomBigContentView() 方法中:
Notification.Builder builder = new Notification.Builder(context)
        .setSmallIcon(R.drawable.ic_phonelink_ring_primary_24dp)
        .setCustomBigContentView(bigRemoteView)
        .setStyle(new Notification.DecoratedCustomViewStyle());
        .setAutoCancel(true);
如果我们使用 setCustomBigContentView() 方法而没有用 setCustomContentView() 方法设置折叠状态的layout,这时我们的 notification 将会简单的折叠成一个只显示应用名称的状态,如下图所示:
所谓最佳实践,如果你提供了展开大小的 notification 视图那么你应该也提供一个折叠状态的视图。这是因为没有折叠状态的视图将与用户没有任何的交互,这是与 notification 的设计初衷相违背的!如果你只用到展开或是折叠中的其中一个状态,那么你应该只使用折叠状态。
使用能折叠和展开的视图
如果我们希望我们的 notification 又能折叠和展开,那么我们在创建 RemoteView 实例时就应该调用 setCustomContentView() 和 setCustomBigContentView() 这两个方法。
Notification.Builder builder = new Notification.Builder(context)
        .setSmallIcon(R.drawable.ic_phonelink_ring_primary_24dp)
        .setCustomContentView(remoteView)
        .setCustomBigContentView(bigRemoteView)
        .setStyle(new Notification.DecoratedCustomViewStyle());
        .setAutoCancel(true);
现在我们设置了一个既能折叠又能展开的 notification ,用户能展开 notification 来查阅更加丰富的信息。
自定义悬浮视图
我们同样能在悬浮 notification 中使用自定义视图。使用上一章中同样的方法来创建一个 notification ,我们可以简单的调用 setCustomContentView() 方法来设置 RemoteVews 的自定义视图。
最后
我们简单的查阅了一个新的 notifications 在 Android N 中并且学习了怎么实现它,那么现在就把这些应用到你的旧的或是新的应用中去吧!我想这些新功能对于安卓平台来说也是棒棒的,这些 notifications 的新功能不仅强大,而且我还期待在应用中更加强大的 notification 展示。如果你有任何问题,请联系作者的 tweet 或是直接到 原文 留言 :)。
p.s 别忘了到 原文 中点击推荐按钮哦!